PROS: Everything. High IR resolution, 4 hour battery life, wide temperature range, high thermal sensitivity, IP54 waterproof and dustproof, cloud connectivity with Wi-fi and Bluetooth, OTA updates.
CONS: A bit expensive.
| Product | Type | Resolution | Battery capacity | Waterproof | LCD screen | Price |
|---|---|---|---|---|---|---|
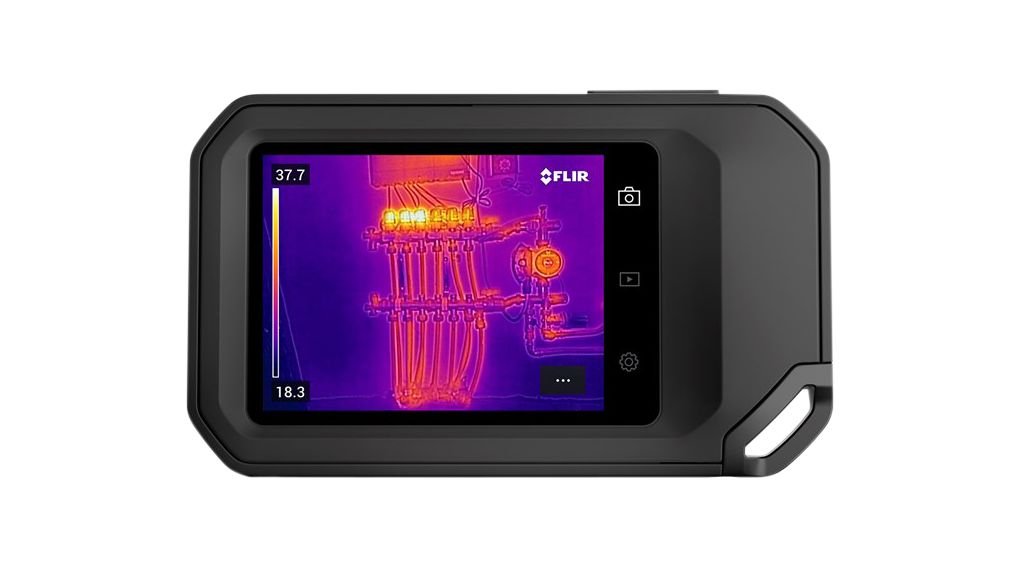
FLIR C5 | Handheld | 160 x 120 | 4 hours | Yes | 3.5″ | Click for more info |
FLIR ONE Pro 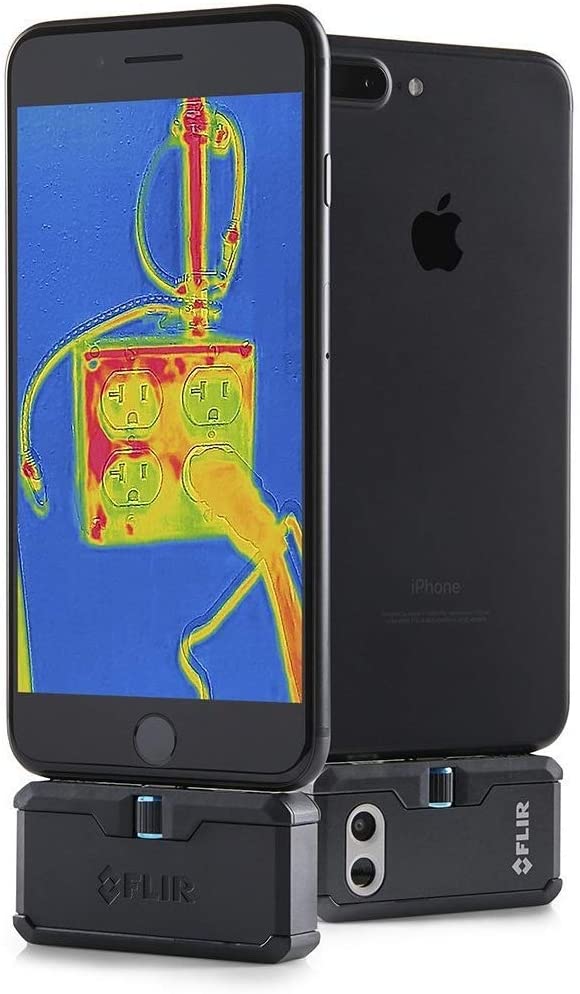 | Smartphone (2 different versions – Android & iOS) | 160 x 120 | 45 minutes | No | Uses Smartphone screen | Click for more info |
Seek Shot 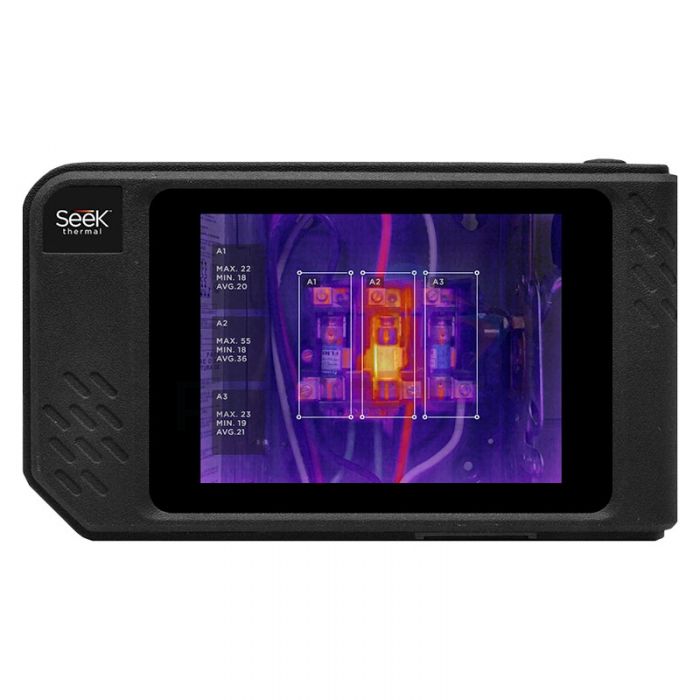 | Handheld | 206 x 156 | Li-Ion, 4 hours | No | 3.5″ | Click for more info |
Fluke PTi120 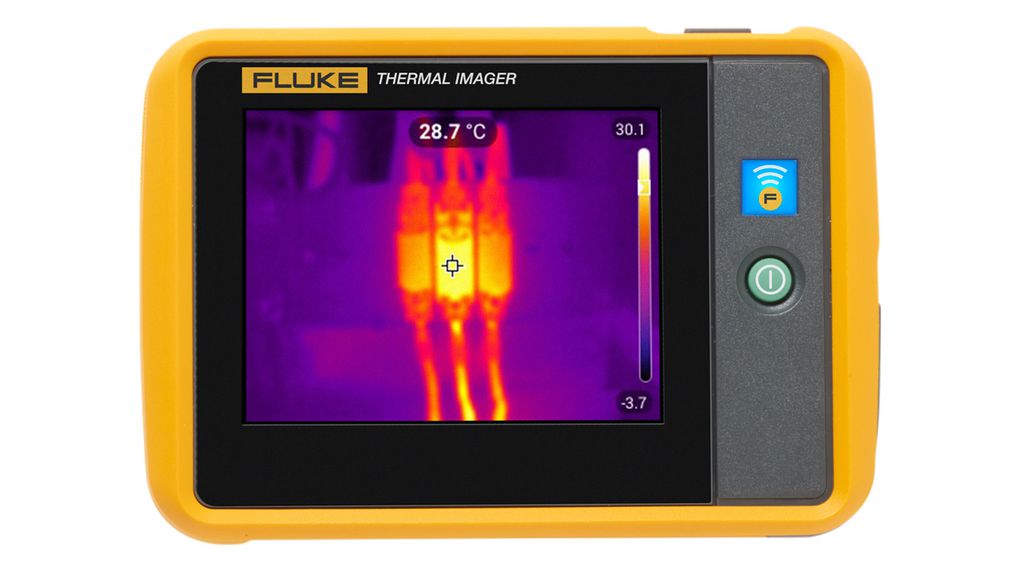 | Handheld – Pocket | 120 x 90 | 2 hours | Yes | 3.5″ | Click for more info |
FLIR E5 Compact 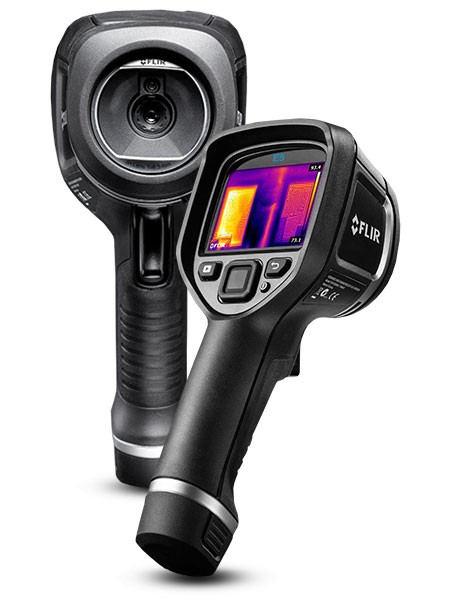 | Handheld | 120 x 90 | 4 hours | No | 3″ | Click for more info |
FLIR C5 Specifications
| Type | Handheld |
|---|---|
| Resolution | 160 x 120 |
| Pixels | 19200 pixels |
| Connectivity | USB, Wifi, Bluetooth |
| Temperature range | -4 to 752°F (-20 to 400°C) |
| Accuracy | +/- 3 C |
| Thermal sensitivity | 0.05°C |
| Distance | |
| Storage Type | Cloud Transfer |
| Battery capacity | 4 hours |
| Dimensions | 5.4 x 3.3 x 0.94 in |
| LCD screen | 3.5″ |
| Refresh rate | 8.7 Hz |
| Applications | electrical, mechanical and building diagnostics, electrical and mechanical overheating, air leaks, moisture ingress, missing insulation |
| View Angle |
FLIR C5 – Specs & Review
Let’s do an overview of the Flir C5 thermal camera. It is the latest iteration of Flir’s successful pocket thermal series. It has a 5 megapixel visual camera, an IR sensor and an LED light.
Like the previous models, the Flir C2 and Flir C3, it is equipped with USB connectivity, Bluetooth but also Wi-fi for cloud connectivity.
Let’s get more in-depth with our Flir C5 review.
On the main screen you get the thermal image and a color scale on the side. You can switch between 4 image modes: Thermal (Only what the IR sensor captures), Visual (Only what the regular camera sees), MSX (An intelligent overlap of the images from the two sensors using Flir’s intelligent MSX technology) and Picture-In-Picture, where you get the visual image on the whole screen with a cut-out in the middle that shows the thermal image.
As far as the temperature reading goes, you can have the center spot value and then you can add the coldest and the hottest spot and they can all appear simultaneously on the screen.
There is also something called 1-touch level/span where you touch a part of the image and the camera will automatically adjust the level and span (obviously) so that it highlights that part and darkens the rest. It works really nice and lets you focus your attention on just the object you are measuring.
The user can switch between multiple color palettes: Iron, Rainbow, Rainbow High-Contrast, White Hot, Black Hot, Arctic and Lava. The white and black palettes are great for spotting the warmest or coldest parts of the image and the High-Contrast was the most comfortable for me when I want a general view. You can also lock the color scale between a set interval using the slider.
Other measurement parameters which you can set include emissivity which is set by default at 0.95 and you will mostly be using it with that value except for special materials or forehead temperature checks. You can set the reflected temperature, relative humidity, the atmospheric temperature and also the distance. If you want to get a very accurate reading you can fiddle with these and set them at more precise values to help the camera. You don’t need to be a pro to adjust them because you can find guides on google for each parameter on how to set it for what you want to measure.
If you pull the drop-down menu, you’ll get an overview of the quick functions, to enable or disable wi-fi and bluetooth, turn on sync with the Cloud with the upload function, adjust the brightness of the LCD screen and activate the LED light.
You can use the bluetooth function to tether it to your phone and share its internet connection to the Flir. We love the auto-upload option because it instantly syncs the images to the Flir cloud.
In the device settings menu you can also set the language you want to use, the date and time but also the unit of measurement between Fahrenheit and Celsius. This applies to distance too where you can switch between meters and feet.
You can adjust the screen brightness, but there is a quicker way to do that, turn on the Auto Power Off function, screen rotation, enable or disable the temperature scale and the option to update the device.
In the gallery, you can view your thermal images and the Flir displays the captured thermal image and next to it, the visual image for comparison, along with some temperature data. It provides in-camera post-editing tools where you can change the color palette and the measurement tool.
Apart from being rugged and reliable, the camera is really easy to use, you don’t need any thermography training. Yes, Flir provides OTA updates for it. This is the first thermal camera that really feels like a 2020 device.
FLIR C5 – Thermal imaging quality
So what is better and improved with the FLIR C5 compact thermal camera in terms of image quality? First of all, there is the IR resolution which on the C5 infrared camera is 160 x 120. This accounts to 19,200 true thermal imaging pixels. Now that’s more like it. The previous Flir devices lacked a bit in resolution but now this thermal imager is on par with the standard for its price class.
In addition it also packs a 5 Megapixel Visual Camera. The digital files are saved in standard JPEG file format together with all the 14-bit measurement data in radiometric form showing the temperature for each pixel. When you use the MSX multi-spectral dynamic imaging feature, the images look great because you can easily distinguish the shapes of the objects you are looking at. Having this data also helps in order to further process the images in the Flir thermal studio software suite.
The refresh rate is the same at approximately 9Hz and it actually cannot be higher because then a special license would be needed in order to export these products because of US legislation.
Manual focus mode was not added this time either to the camera, but the IR resolution is so high that you won’t miss this feature.
FLIR C5 – Temperature Range, Accuracy
The thermal sensitivity was also improved, the Flir C5 sports a thermal sensitivity of 0.05° C which is superior to the 0.07° C standard that you would get from other thermal imaging cameras with the same price at the moment.
The temperature range was widened at the high end, the camera is now capable of detecting temperatures of up to 400 degrees Celsius. If you remember, the old Flir C3 could only get up to 70 degrees. However, the low-end was narrowed, you can only measure temperatures down to -20 celsius whereas the C3 could detect down to -40. Now here you need to know that Flir splits this range into two parts and you need to toggle between the two modes in order to get an accurate reading.
The camera is usable in very cold environments like in freezers or freezing chambers but now with the higher tolerance, you can check insulation on very hot ovens, it can be used for firefighting if necessary and HVAC should be a breeze.
For this camera, Flir states that its thermal accuracy is +/-3 degrees. This is not exactly a strong point because for this price you can easily get infrared cameras with a 2 degree accuracy.
The viewing angle was widened to 54 x 42 which means you will be able to capture much more in your thermal image.
FLIR C5 – Battery life & Memory
This infrared thermal camera also brings another new innovative feature for this field, cloud connectivity. It has its own internal memory storage which can store up to 5,000 images. But in addition to that you can also sync it with Flir Ignite cloud connectivity which is Flir’s cloud platform to directly upload images right after you’ve taken them.
The Ignite cloud solution is probably the first thermal cloud platform ever built. The images together with their entire radiometric data are uploaded(temperature reading for all the 19,200 pixels in the image) The lithium-ion battery capacity was doubled to 4 hours which is something that the users are going to be happy about because the older models only had a 2-hour battery life. The power supply / charger comes with multiple adapters for different countries.
The Flir C5 pocket thermal camera also has an IP54 rating which means it is waterproof and also dustproof. This is something you didn’t get on the older versions. It can also withstand a 2m drop.
The LCD screen size is bigger, it is now a 3.5″ color touchscreen, the resolution is great and it just feels faster and more responsive. Having an integrated touchscreen makes the menu really easy to use and intuitive.
Where would we use this camera? In pretty much anything from HVAC, home inspections and building inspections, electrical inspection for quickly identifying wiring that is overheating, hot fuses and PCB circuit boards, automototive, you can use it in maritime navigation, in plumbing issues where you check for leaks, inspect air flow and many more. You just have to be creative with it. If you are a home inspector, this is one of those professional tools to have in your test kit.
You can mount it on a tripod and use it for body temperature screening but there, FLIR has other products like the EST thermal screening solutions
